how to repair and cleanup a 3d scan?
When you have imported your 3D scans and you have unconnected geometries, scanned a part you don't want like a table or you want to smooth the 3D scan so it will be better you can use this tutorial.
Time to finish: 5 minutes
Required: A 3D scan of a foot
Required: LutraCAD Insole or Shoe last software
Please note that there is also a YouTube video available for this tutorial.
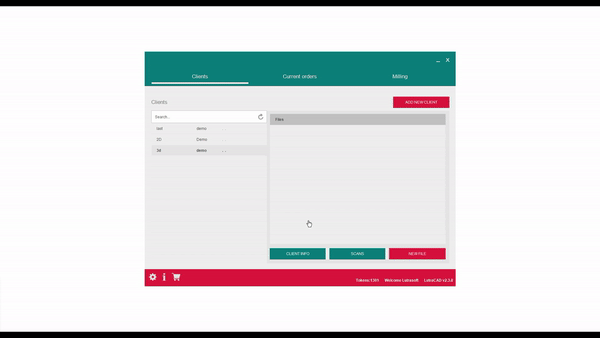
Step 1: Open LutraCAD Manager
Open the LutraCAD Manager. After you have logged into your account:
- Go to the tab 'Clients'
- Select a client on the left handside

Step 2: Select 3D scan
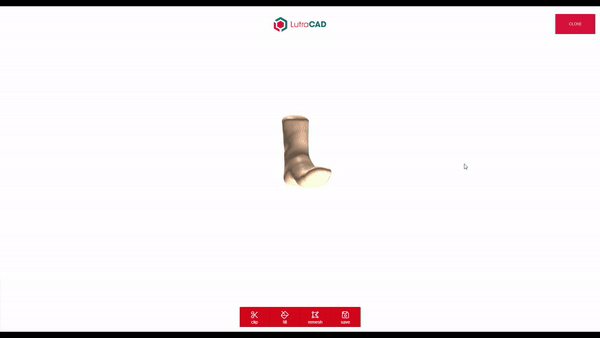
After selecting a client click on the 'Scans' button and select your 3D scan. Now click on the cogwheel to open the repair window.
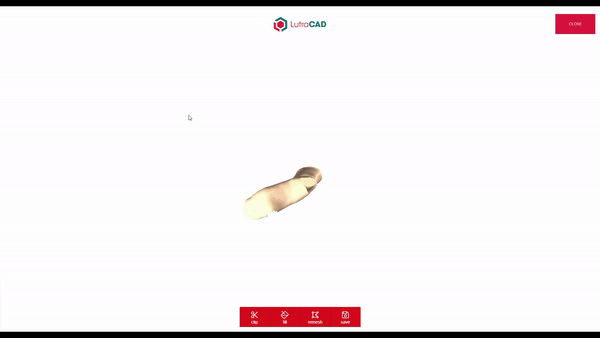
Step 3: Select reference points
Select the three reference points MTP5, MTP1 and the Heel.

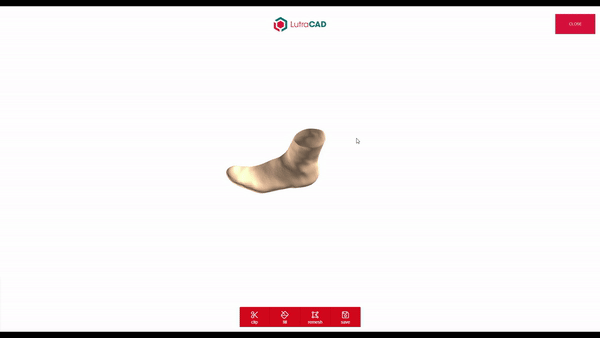
Step 4: Select the geometry to keep
This is optional, if you scan only has one geometry. Then this step can be skipped.
Click on the geometry you want to keep.

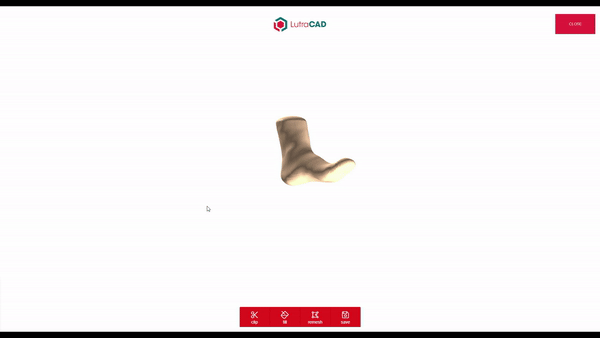
Step 5: Clip unwanted parts
This is optional, if you want to remove parts of the scan you can position your camera and use the 'Clip' button.
Click on location A, hold the mouse and drag to location B. When releasing the mousebutton the software will ask if the red part is the part to be removed.
Click on 'No' to swap to the other part to remove.
Note: The software will select the smallest part.
Step 6: Fill the holes
This is optional, if you have holes in the scan and you want to fill them keeping the anatomical shape, you can use the button 'Fill'.
Step 7: Remesh
When the vertice edges of the geometry do not have the same length we can use this button, this will clean up the geometry and smooth out the mesh a little bit.
Step 8: Save
When everything looks great you can use the 'Save' button to finish this tutorial.
Need help finding the right
anwer to your question?