Enable the boundingbox
Time to finish: 2 minutes
Required: LutraCAD Insole software
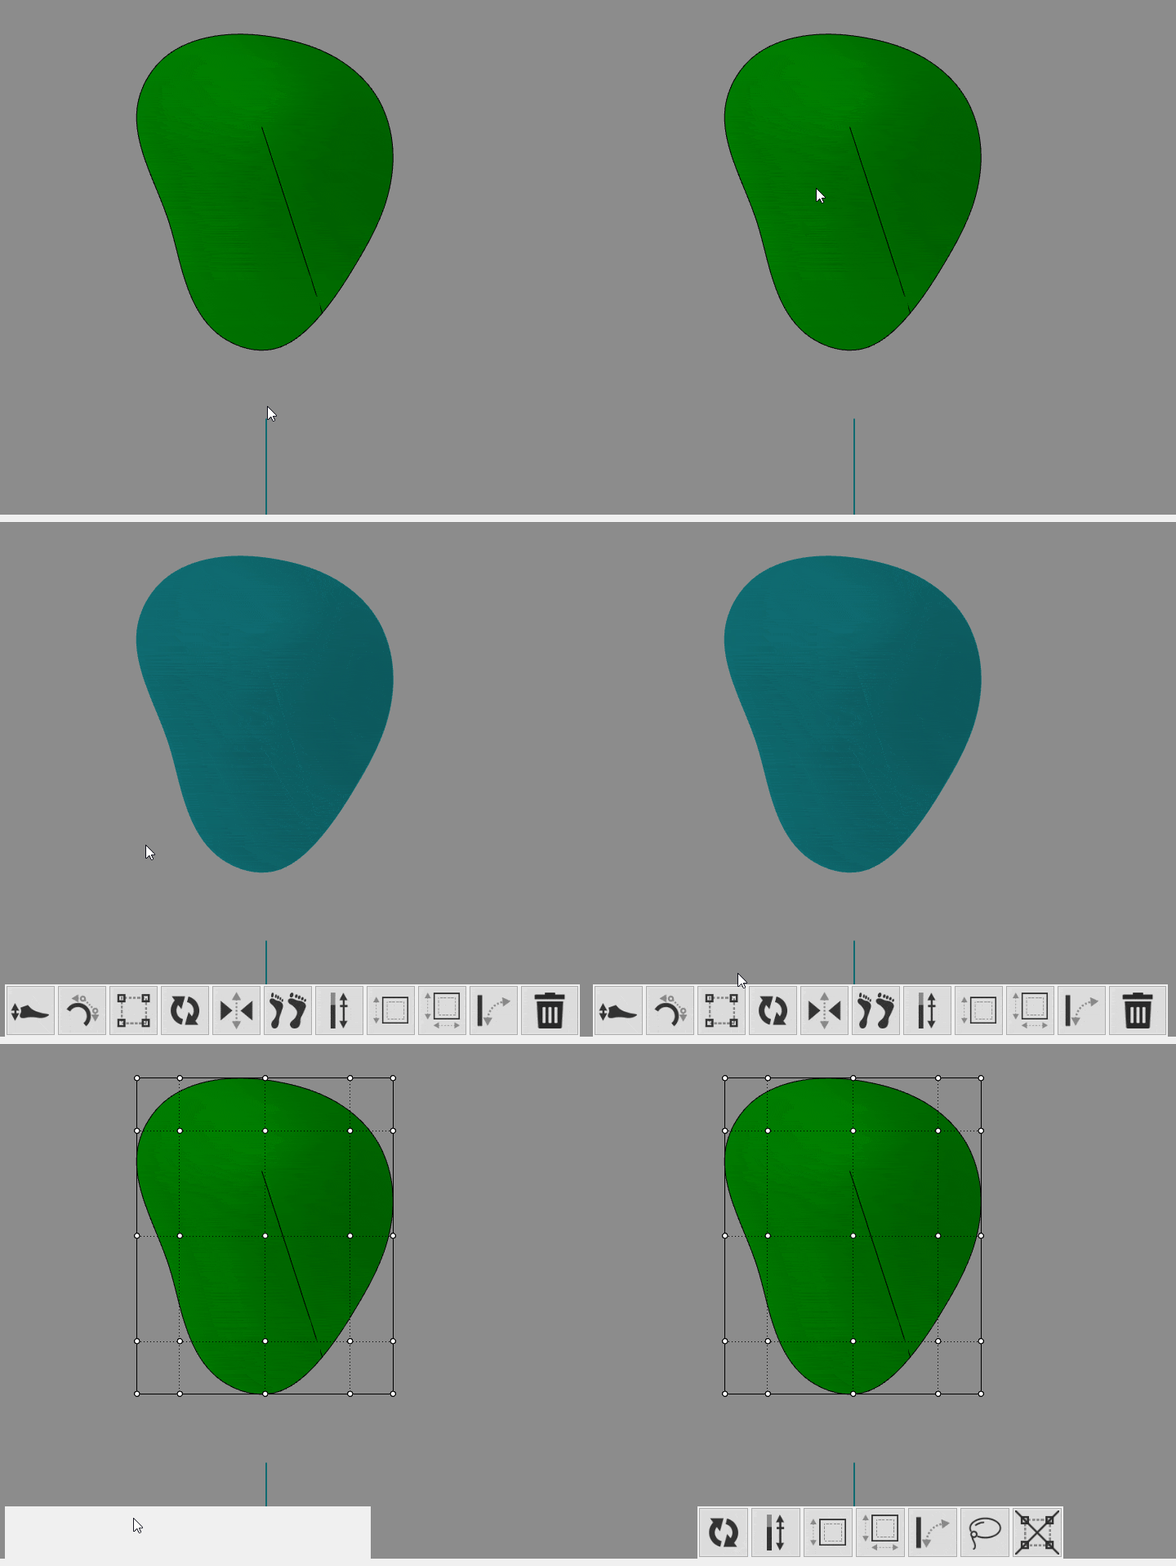
The bounding box is used to change the shape of a selected element. The selected element can be made wider, smaller, higher or lower in a selected area. It works by following the next steps:
boundingbox instructions
- Select the element you want to change
- Click on the icon shown below
- The bounding box will appear around the selected element
ATTENTION: by hovering the button you have the possibility to increase the amount of dots in the Bounding Box.

Disabling the boundingbox
Time to finish: 2 minutes
Required: LutraCAD Insole software
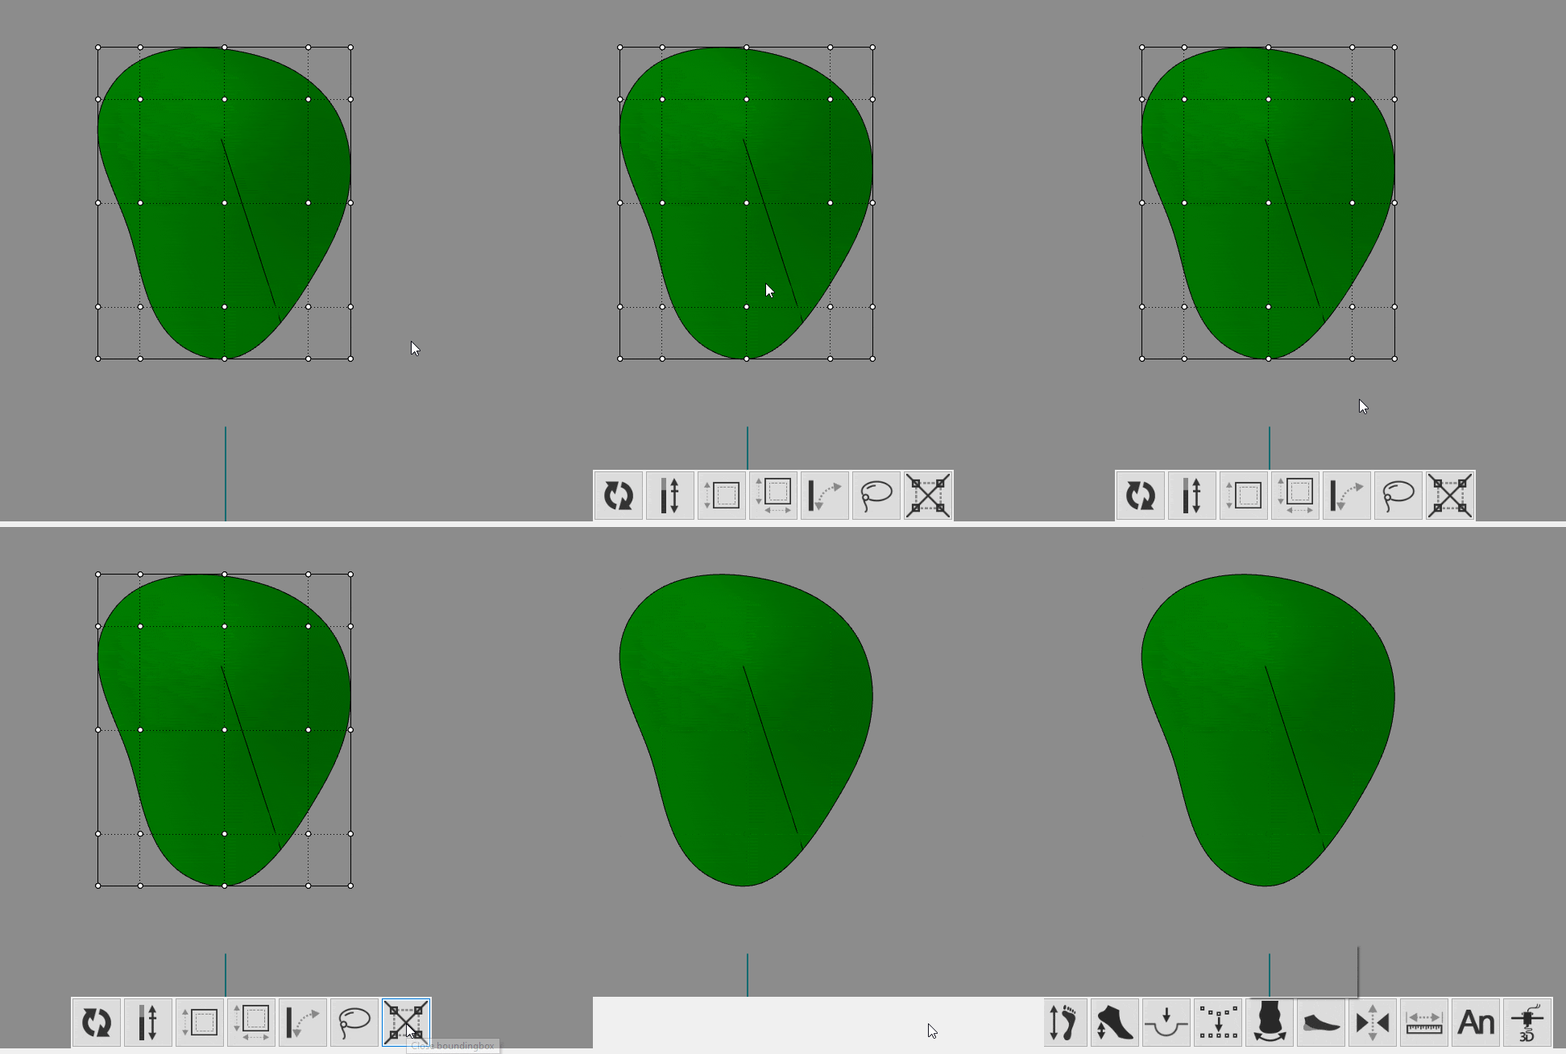
Once activated the boundingbox, this button is used to close.
Close boundingbox instructions
Deactivating the Bounding Box or the Control Points can be done by clicking on the icon

Related pages
Need help finding the right
anwer to your question?

